Add Camtasia visual effects to videos: Edge, Clip Speed, Color Adjustment, Colorize, Device Frame, Drop Shadow, Brightness, Remove a Color
Camtasia
is the program of choice to create screencast i.e. tutorials including computer screen recording. It is a commercial program that can be installed from the dedicated page by the manufacturer.
TechSmith. It is installable by going to download about
windows let's go mac.
In addition to having a very flexible tool to capture the entire screen, or a rectangular selection of it, it can also be used as a
Video editor as it has several features for film post-production.
In this post I will deal with those who are
Visual effects that can be
added to videos and customized by changing their default parameters. Camtasia however there is also
audio effects including fade in and out and noise removal. In this article I will refer to the
2020 version which is what i own but i believe in
version 2022 currently available, there are even more tools available.
To add video files, audio files, image files and screen recordings, click import media or alternatively you type Ctrl + A on your keyboard to open
file explorer from windows in which to select the files.
Videos drag to the Timeline at the bottom, as well as images from which you can modify the length of the clips at will by acting on the track handles. The various clips can be placed on top of each other.
posted on my
Youtube channel
a tutorial in which I illustrate how to add
Visual effects
from Camtasia.
Inside 2020 version from the gli program
Visual effects
are in number of ten.
You can add an effect to a clip by selecting it, right-clicking the effect, and choosing
Add to selected media. Alternatively, you can
drag the effect on the clip with the cursor.
1) EDGE
With Border you add a border to the videos you want to set it for thickness and the color. The border will be outside the video.

After adding the effect Border to the clip, in the column of properties the section will be added
Border
where to adjust it thickness from the edge (of
1px
for 50px) and yours color. To remove the effect, click on the cross on the Border inside
properties. This effect is useful for
put one video on top of another with a frame.
2) CLIP SPEED
The effect clip speed it is used to increase or decrease the playback speed of the clip and therefore decrease or increase its duration respectively. By default, playback is set to
1.0x.
It is managed from properties.
if you type 2,0 and go up Type yes
double the speed Well, yes half the duration inside
minutes, seconds and frames.

Also for this purpose, to return to the normal situation, place
1.0x or delete it by going to the cross.
3) COLOR ADJUSTMENT
The effect color adjustment serves for
change colors. It is added to the clip in two ways.
By default the Saturation is brought to
-100 making the video black and white. In addition to Saturation however, you can interact with the cursors of the Shine he was born in
Contrast to choose the best aspect for the video.

As with other effects, there are also duration values for
ease in AND To facilitate. You can then set the time of To start is the one of end
of the effect that will be applied continuously as if it were
keyframes.
4) COLOR TONE AND 5) COLORIZATION
These are two very similar effects that allow us to
add a color to the video and adjust it
the intensity.
With color tone are added 2 colorsone of light tone It is one of dark tonethat can be modified. With
To color instead, add
A Collor, also this modifiable and customizable in intensity.

There are tools for these two effects as well
ease in AND To facilitate to set the start and end of the effect.
6) DEVICE FRAME
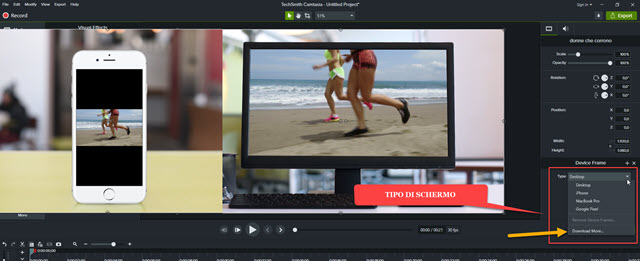
This is an interesting effect because
put the video on a screen
from a PC or smartphone.
They are fixed positions in the device images and not in the video as we saw done with
shotcut.

screens are available
Desktop, iPhone, MacBook Pro and Google Pixel. You can continue download more to open the page
Active from TechSmith to download others, after creating an account.
There are some free and some paid. Files in the format will be downloaded .TSCDF to double-click to automatically import them into Camtasia. Imported devices will be added to the effects list.
7) SHADOW
As the name suggests it is an effect that allows us to add
a shadow. We cannot add it to a video, but only to an image in PNG or GIF placed on a track above the video itself.
O animated pictures in format gif to be aesthetically valid they must have it
transparent background.

After adding the effect to the clip png or from gif you go up properties to set the parameters.
There is 9 squares to choose the position of the shadow. By default the color is Black but it can be changed by clicking on the palette. with the cursor Detour you define the
distance from the shadow, with Opacity your
transparencywith Blur there blur while the values of
ease in AND To facilitate they have the function already seen in the other effects.
8) SHINE
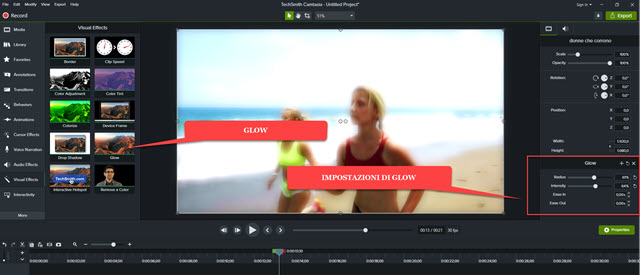
The effect Shine add a luminescence for the video to be customized with the sliders of the ray it's from
intensity.

even in the effect Shine there are the values of
ease in it's from To facilitate with the meaning already seen.
9) INTERACTIVE HOTSPOT
This is an effect that allows the user to add a
link
for one Web page at a point in the video. However, there is limitation that this link only works if you export the video with the
Camtasia player.
If you export without a player, the link does not work and therefore this effect cannot be used for videos published, for example, in YouTube. After adding the effect to the video, it goes up properties.

For example, check a urlpaste a page address and go up Test to check if it is opened regularly. To export the video with the
Camtasia player I refer to the embedded video.
10) REMOVE A COLOR
It is an effect which is identical in all respects to those
chromatic key
or Green screen already seen in shotcut
AND
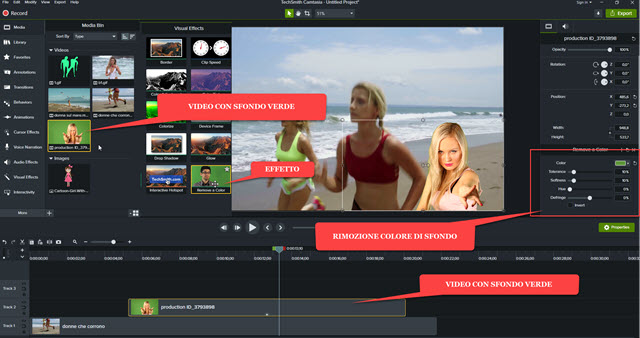
da vinci resolves. It is used to remove a soft background from a video by selecting it with the color picker.

You place the video with the same background on top of another one that will replace the original background. The effect is added remove a color to the video above. About properties click on the arrow next to the green coloryou go to icon
Dropper and click on one
background pixels
to select the color to be deleted.
You can improve the result by acting on the sliders on the
Tolerance, softness, hue and fringe. The video that will now have transparent background can now be repositioned and resized using the handles.
