How to create colorful clouds with Gimp to add to photos or drawings to insert text to show dialogues between characters as in comics
A comics or cartoon they haven't known a crisis for decades and the development of the web and new readers has done nothing but multiply the supply of these products. So, a conception of comics in a broad sense can include other forms of very popular expressions, such as the MEME. One thing common to all cartoon strips is the presence of
clouds
where del is inserted text to show the dialogue between the protagonists of the scene visible in the photo or drawing.
In this article we will see how to create these bubbles in the form of
rectangle, with rounded corners and shape
elliptic, including, however, that characteristic appendix which indicates the person to whom the text refers. In a future post we will see how to create even more complex cloud-shaped comics that are the most used.
Later we will also see how to always add borders with
GIMP
and how to use comics to simulate a
chat in a video through the tools of
da vinci resolves. But let's go step by step and start seeing how to create colorful comics to add text and with an indication of who is saying it.
posted on my
Youtube channel
a tutorial showing the steps of how to create the different styles of comics.
who still didn't have gimp
on the computer you can go to the button downloadchoose the link for your operating system and click on the option to download gimp directlyfree and cross-platform program that reached version 2.10.30
at the time of writing. open gimp and go up
File -> New.
In the window that opens, set the appropriate size, for example
1920 x 1080 pixels, and click on
+ advanced options. You choose
Transparency inside fill with then click on OK to view the transparent project.
You choose the tool rectangular selection is at
tool optionscheck a
rounded edges.
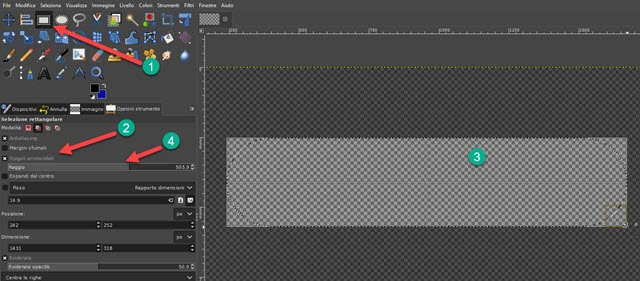
You draw the rectangle on the transparent project with the cursor and then adjust the ray rounding.
now select it path tool clicking on it, typing B. on the keyboard or going to the top menu
Tools -> Paths. This tool is used to add a tail for the comics to indicate who is speaking.
You click inside the selection and then externally and internally again with the Projects. You then switch to mode To edit and click again on the first click to create a triangle. By dragging and dropping the cursor, you click approximately in the middle of the two outer sides of the selection to
bend them creating a curve.
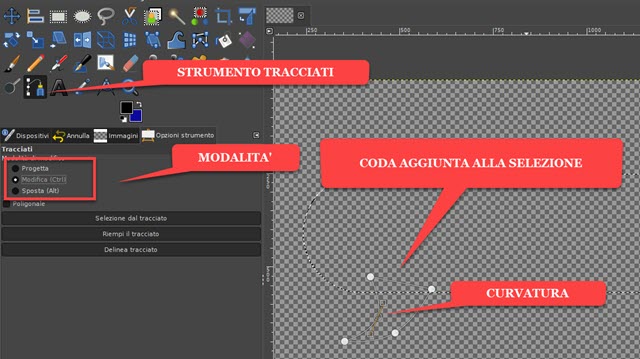
When selecting the mode move you can move the tail relative to the rectangle with rounded edges.
While holding down the Shift key, click the
path selection then go to top menu
Select -> To Path. A selection will be created including the rectangle and tail that was added.
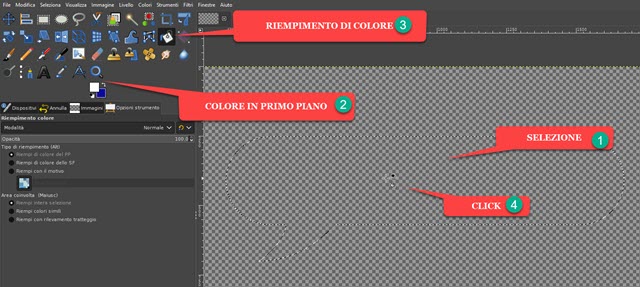
Click on the appropriate palette and choose the color cartoon, white in my example. The tool is then selected
color fill and click inside the selection which will be colored and can be saved.
Before saving you can cut the project with the rectangular selection, this time without the rounded edges, to eliminate the superabundant part of the screen. To cut you up
Image -> Crop to Selection.
so continue File -> Export As… to open a window to choose the output folder.
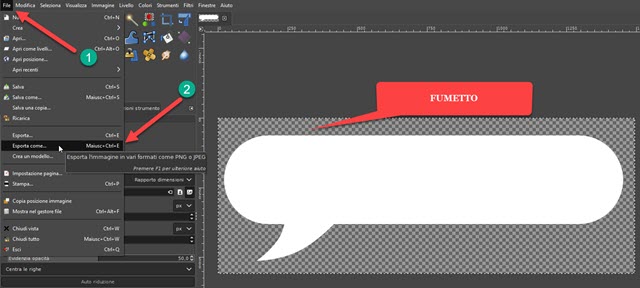
You give the file a name with the extension .PNGfor example strip.pngyou go up Export and then again Export.
The comic strip can also be mirrored using the tool I think with the tail pointing the other way.

if it is the cartoon is selected You can also
change the color with the tool
color fill.
COMICS IN ELLIPTICAL STYLE
The procedure adopted for rectangular speech bubbles with rounded edges can also be used for those elliptic.
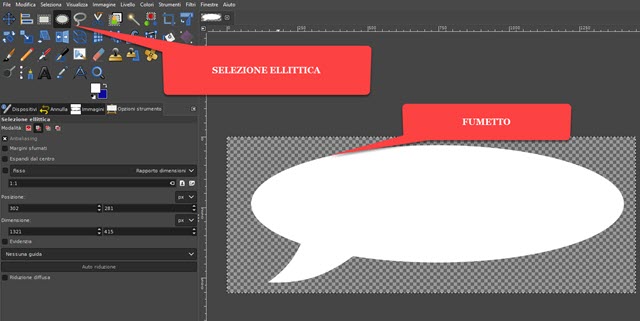
You create the same project, but instead of using the rectangular selection with rounded edges, you use the tool
elliptical selection while the
cartoon tail it is added exactly as illustrated above.
same type comics elliptic Yes, they can
color and mirror such as rectangular ones with rounded edges. if not tool options of
elliptical selection
you choose the How to add to current selectionyou can create clouds adding on the edges of the main other elliptical selections.
HOW TO INSERT COMICS IN PHOTOGRAPHIC SCENES OR DRAWINGS
always inside gimp opens the photo or drawing file to which you want to add speech bubbles with text. Depending on the position of the characters, they are chosen more appropriate styles for comics and import into other tabs.
You select the card with the balloon and type Ctrl +
C. by copy then go to scene tab and type Ctrl+V.
paste it. The tool is then selected
Ladder for your resize.

After resizing and repositioning the speech bubbles, in the
Levels
a new level will appear floating selection. Right click on it and choose
immovable level in the menu that opens.
So let's go to the instrument Text and text is added to the scene comics by choosing a family
font, style, color and alignment. The text can be
selected clicking on it and going to the keyboard
Ctrl + PARA.
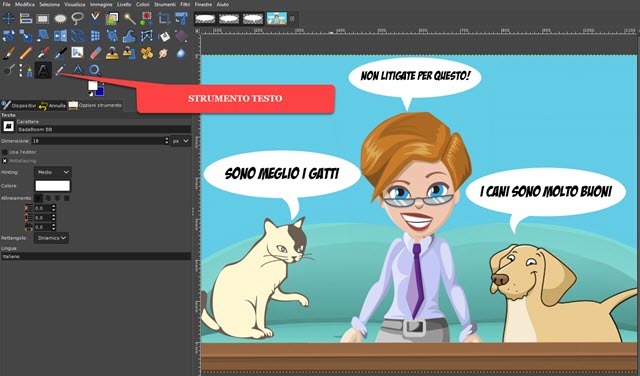
After selecting the text, you can add the Audaciousif they can change the size and you can
Replacement with the tool move. The scene created with PhotographI comics and the
text
can then be saved inside JPG going up export astyping the first name of the file,
output folder and going up 2 times Export.
